Search here...
0
TOP
DIY Furniture Inspiration Paint Tools & Products

Antique Writers Desk Makeover: Step by Step Tutorial

antique writers desk makeover
38 Views

antique writers desk
from new orleans:
the makeover

antique writers desk makeover step by step tutorial by reconciliation furniture
Ready to start flipping furniture for profit?!
This is a great beginner friendly tutorial to show you just how much a little paint can DRASTICALLY transform a space.
 In this blog post, I will be sharing with you exactly how I accomplished this look! Easily replicate this look with step by step instructions & to save you some time- all the product I used are linked to Amazon.

YOU ARE GOING TO LOVE this COLOR!

HAPPY FLIPPING!

the nola antique writers desk MAKEOVER: FULL TUTORIAL

antique writers desk makeover: before

Furniture Backstory:

This beautiful antique writers desk was picked up in New Orleans, Louisiana! While my mom was visiting my cousin. Susie- she noticed this beautiful antique writers desk in her historic antebellum home and fell in love. Susie had just painted it and wasn’t happy with it so she gifted it to my mom! My mom has had it for several years now and since she moved into a new house with new colors- she needed the piece painted to match her new décor style.

The piece was overall in good condition for how old it is and didn’t require a whole lot of repair.

The Inspiration: 

My mom is super easy to please (when it comes to painted furniture LOL). When she asked for color recommendations, I jumped at the opportunity to show her the NEW National Park inspired line of paints that Dixie Belle Paint Company had just released. As soon as these paint colors were released I was immediately drawn to the color: Smoky Mountains.

I was born and raised in Georgia and a lot of my childhood memories were spent in the Smoky Mountains. The color is a gorgeous blue with grey undertones and I couldn’t wait to paint something with it. I was so excited when she fell in love with the color too and was ready to get started!

the nola antique writers desk MAKEOVER: FULL TUTORIAL

antique writers desk makeover step by step tutorial by reconciliation furniture

the Supply List

Prep & Clean

Paint Supplies

Hardware & Transfers

Step No. 1: Repairs


First, I removed the hardware and began with my repairs. The piece had some spots on the top and sides where a couple layers of veneer were missing (nothing larger than a quarter in size). The original hardware also had left pretty deep indentions in the wood so I decided to repair to use bondo on these areas as well so we didn’t have to limit our hardware options to something large enough to hide these indentions.

I began by mixing my Bondo wood filler and used a puddy knife to push the filler into the damaged areas.

Once my Bondo wood filler was completely dry, it was time to sand these areas down so that they were flush with the wood. I used my Dewalt orbital sander and a 100 grit sanding disc followed by a 220 grit to knock down the bondo until it was even with the rest of the wood and smooth to the touch.

Step No. 2: Cleaning

cleaning with dixie belle paint company white lightening

Next, I cleaned my piece with my favorite furniture cleaner- Dixie Belle Paint Company: white lightening. For this, I needed a bucket, water & a clean microfiber rag.

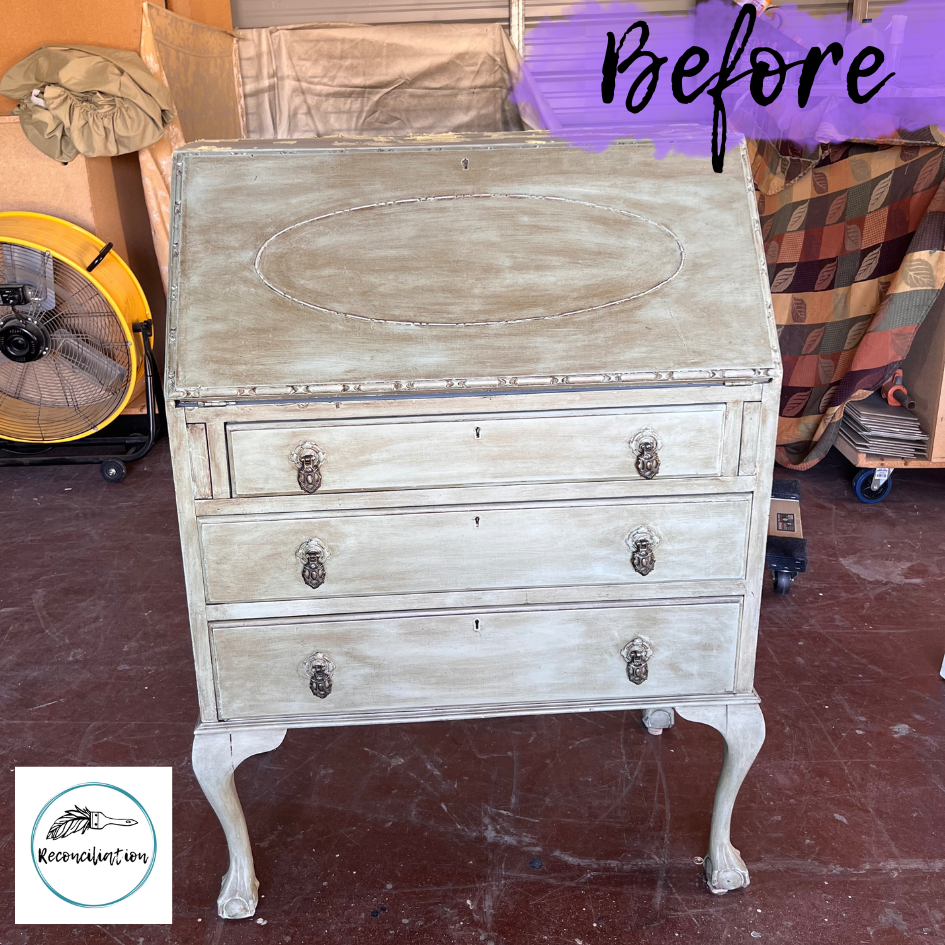
Once my piece is thoroughly cleaned inside & out- I then gave the entire piece a good scuffing for better paint adhesion using a washable sanding sponge. I then dusted the piece off with a clean, dry microfiber rag and gave the piece a nice blow out with my mini shop blower to ensure that no dust was left. I highly recommend investing in a mini shop blower for quick and easy dust removal.

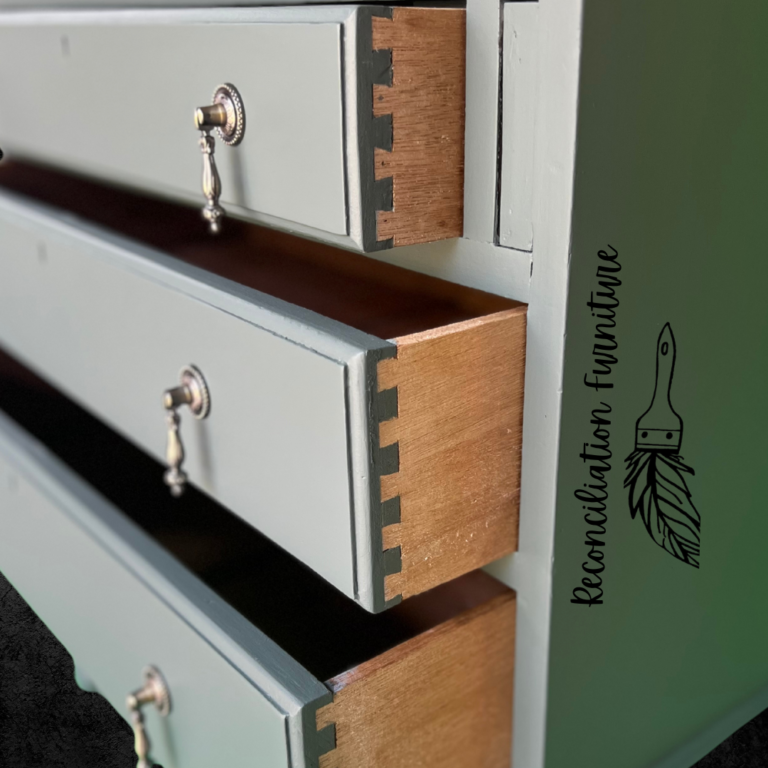
Next, I used painters tape to cover the hinges inside the desk. To protect the drawers from overspray- I used pre-taped plastic to wrap the drawers- leaving only the drawer faces uncovered.

Step No. 3: Prime Time

Then, it was time for primer. Using a high quality synthetic paint brush, I then applied BOSS grey primer to the entire piece.
I applied 2 coats of primer, allowing my first coat to dry completely before applying the second & lightly sanding between coats with my washable sanding sponge.
Applying BOSS grey primer

Step No. 4: Time for color

For this piece, I decided to use my paint sprayer. Using a paint sprayer is going to eliminate brush strokes and allow you to achieve a professional finish. 
(Check out my post on “how to eliminate brush strokes” for additional tips to achieve a brush stroke free finish)
The paint color I chose for this piece: Dixie Belle Paint Company NEW National Park Inspired paint in the shade Smoky Mountains.  

Smoky Mountains is blue with grey undertones- it is freakin’ GORGEOUS!

I applied 2 coats of paint to accomplish full coverage- allowing my first coat to dry before applying my second & lightly sanding between each coat.
Smoky Mountains Paint color

Step No. 5: Applying Transfers

Once my final coat of paint was completely dry- I decided to add some character to the leaflets that extend out when the desk is opened with some transfers! 
I had these simple black & white flowers leftover from a previous project and they were the perfect size!
Transfers are super easy to use! 
I used Dixie Belle Paint Company’s
“Bud & Branches” transfer
bud and branches furniture transfer

Step No. 6: Top Coat Application

I used my handy dandy paint sprayer to apply 2 coats of my protective finish.
The top coat I chose to use for this project- Flat out Flat made by General Finishes. I love General Finishes products- they are top tier in quality and always give me the most flawless, durable finishes. If you haven’t tried General Finishes top coats, you should! You will never use anything else once you’ve tried it! 
applying top coat to protect your finish

Step No. 7: New Hardware

We chose to go with hardware that had a similar shape to the original with an antique finish. I used my Dewalt drill to install the new hardware and we were finished!
The hardware used for this piece were purchased from Amazon! 
 Check out the hardware>> HERE.
Antique tear drop style hardware from amazon
Smoky Mountains NOLA antique writers desk makeover
bud and branches rub on transfer
antique writers desk from nola makeover done by reconciliation furniture

What do you think??? Do you LOVE this flip?? 

I have 7 years of experience working painting & refurbing furniture. Yet, I still learn something new from each project I take on…

If you are new to the furniture flipping game, I encourage you to be patient, experiment with new techniques and styles, and use the information & recommendations available to you from blogs & social media to guide you on your journey.
Like any trade, flipping furniture is A LOT of work but YOU CAN DO HARD THINGS, Queen! 
Don’t give up and stay true to your brand. Learn from your mistakes and never stop investing in yourself. You won’t become a high roller in this business overnight. Take your time, invest in the right tools and believe in yourself! Find a tribe of like minded women for support on your creative journey for quick advice and find a mentor that inspires you to keep going and when you make it, pay it forward.

If you enjoyed this flip, drop a comment and be sure to PIN it for reference!

Thank you so much for your support!

I hope that you found this tutorial helpful & would love your feedback! If there is a particular topic, product, technique, etc. that you would find helpful, please leave a comment or send me an email!

- Reconciliation Furniture

boho furniture artist

dont miss out on any of the fun!- follow me:

antique writers desk makeover

PIN THIS POST!

FOR REFERENCE LATER..

antique writers desk makeover step by step tutorial by reconciliation furniture

«

»