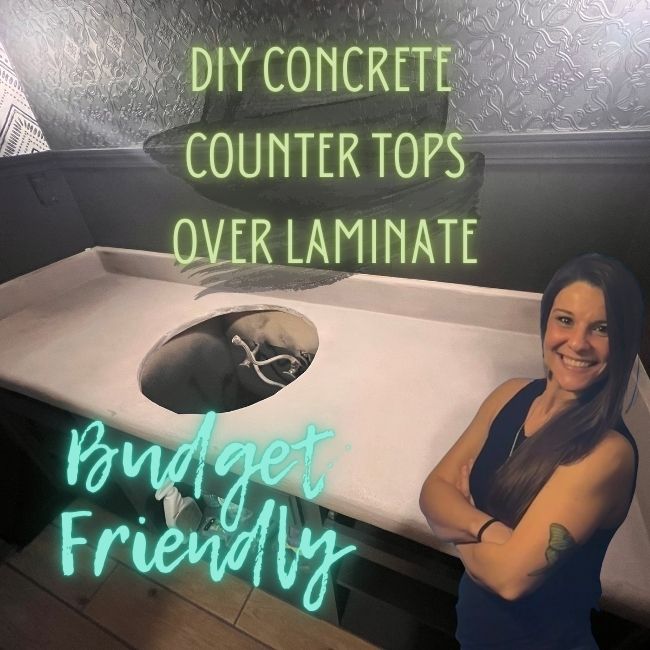
DIY Concrete countertops over laminate (full tutorial)
Budget-Friendly bathroom Makeover hack
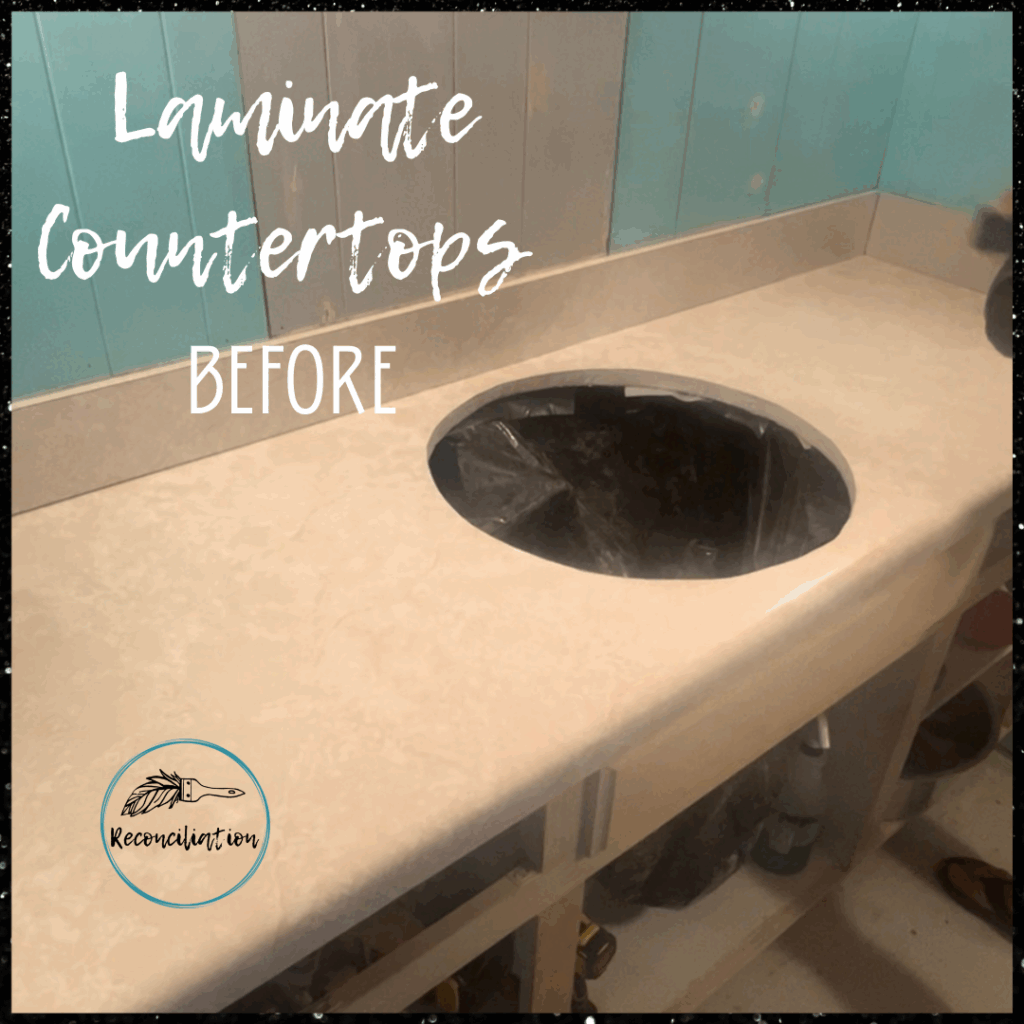
DIY concrete countertops over laminate: full tutorial
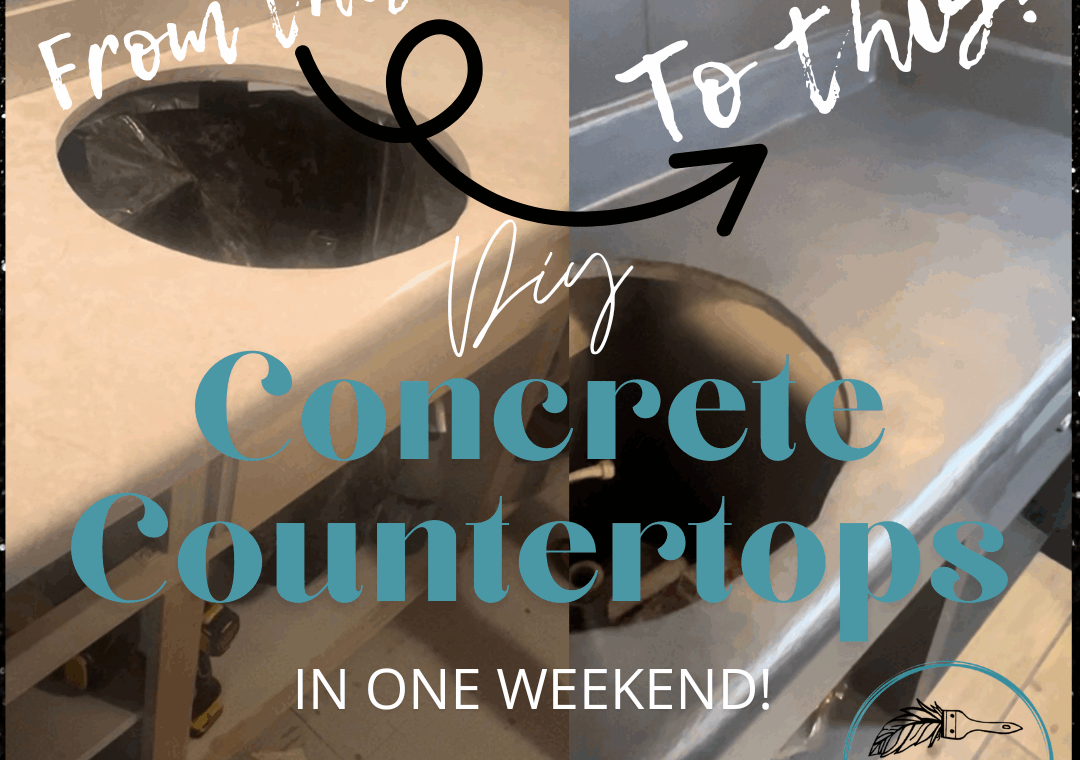
In my budget-friendly bathroom remodel series, I promised to come back and give you the full breakdown of how I transformed my dated laminate countertops into stunning, modern concrete-and here it is!
This step-by-step tutorial walks you through the exact process I used, along with all the tools and materials needed to create beautiful concrete countertops on a budget. You won’t believe what’s hiding under these gorgeous finishes!
Scroll down to see the before and after photos, and don’t forget to save this post on Pinterest for later!
Guest Bathroom Remodel Video Series: concrete countertops
First things first, lets gather our materials & tools needed for this renovation. I’ve made it easy by linking everything you need in one place: Amazon storefront: Concrete Countertop Materials
Supply List:
Dewalt Orbital Sander (optional, but highly recommended)
5″ sanding discs (100 grit & 200|220 grit)
Dirtex spray, cleaning sponge, microfiber towel
Painters tape & pre-tape painters plastic
Henry Feather Finish (at least 2 boxes)
Mixing pan or bucket, measuring cup
Drill mixing attachment or rubber spatula
Metal Trowel or Tile Float
Tile Sponge
Drywall Sanding Black + sandpaper
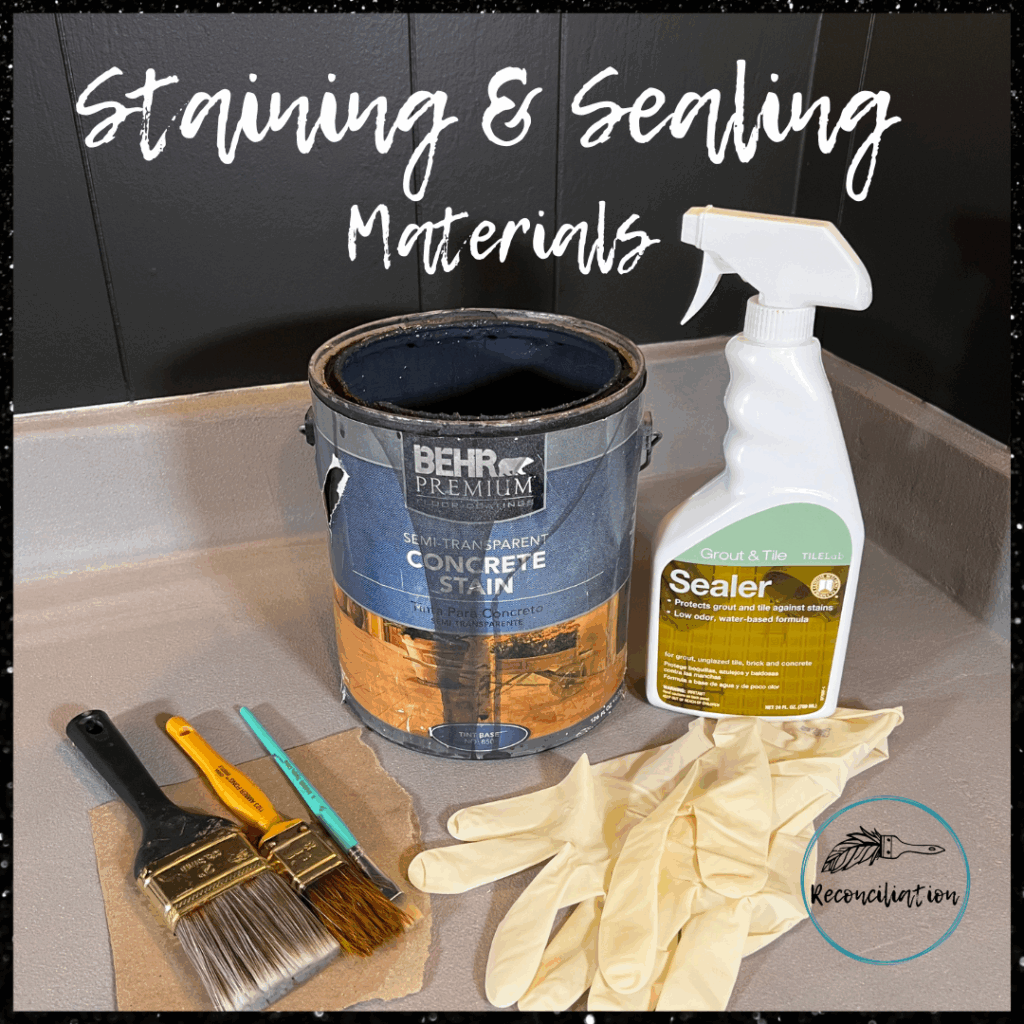
Concrete Stain
Concrete Sealer
Paint Brushes. 2+
PPE: Mask, Goggles, Gloves
Shop Vac
Step-by-step: how to DIY Concrete Countertops Over Laminate- in one weekend!
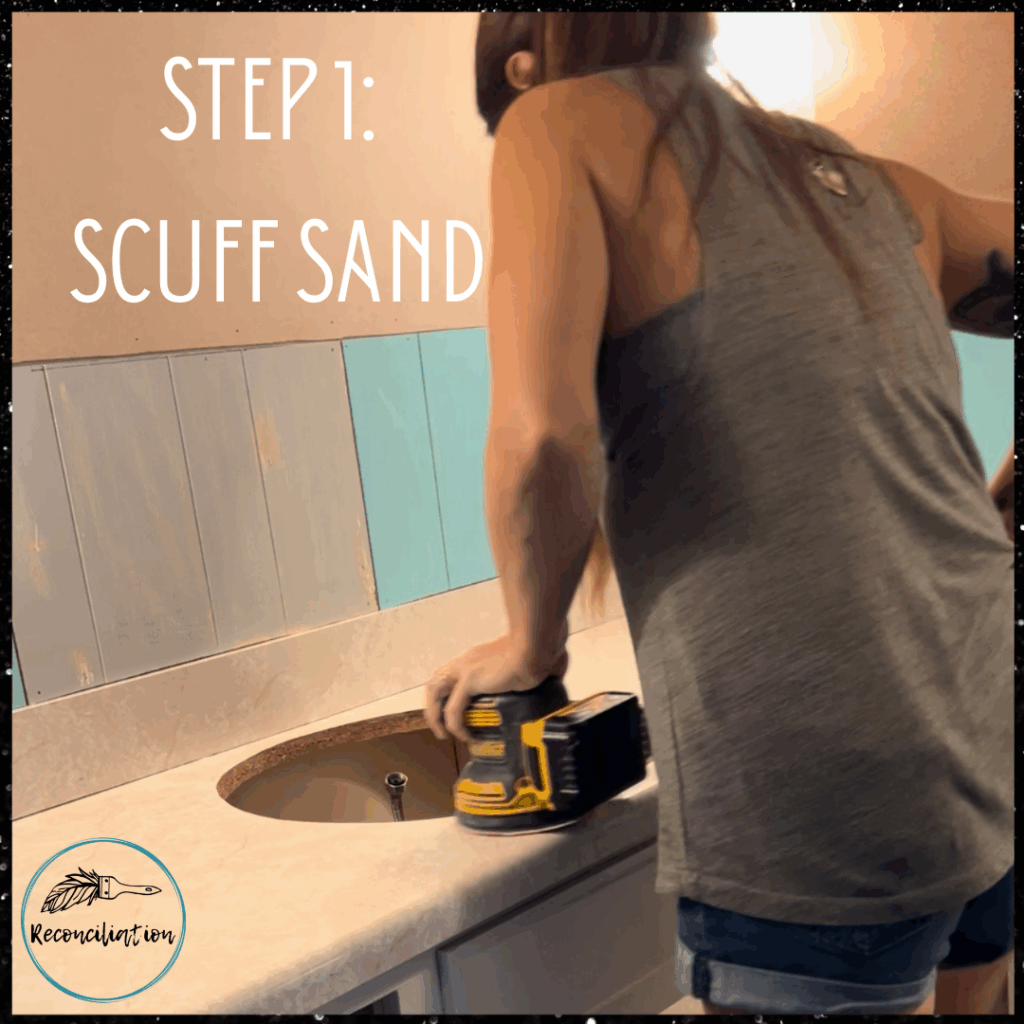
Step 1: Scuff sand the surface
Start by sanding your laminate countertops with 100-grit sandpaper to help the concrete adhere. Use an orbital sander for faster results, especially on curved or vertical surfaces. Be thorough on the edges and backsplash!
Pro Tip: If you don’t want to purchase the orbital sander- you can rent one from Home Depot rental center! Another option is to find your closest Harbor Freight, they sell decent tools for really great prices. Pawn stores are great options too!
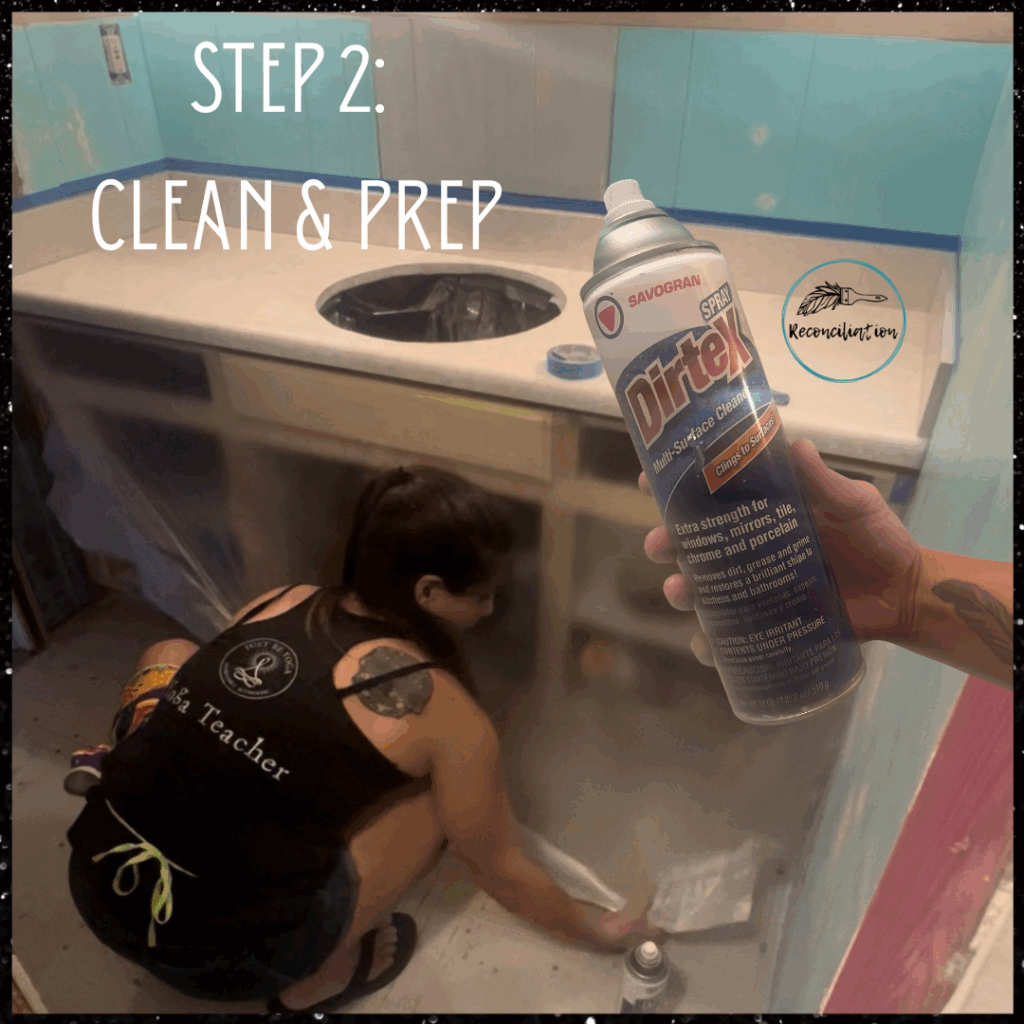
Step 2: Clean & prep the area
Spray Dirtex, scrub with a sponge, and wipe down with a microfiber towel. Then, take your painters tape and plastic to tape off and protect: walls (just above splash), vanity base, floors and doorways (to prevent dust from spreading-don’t skip this step like I did the first time).
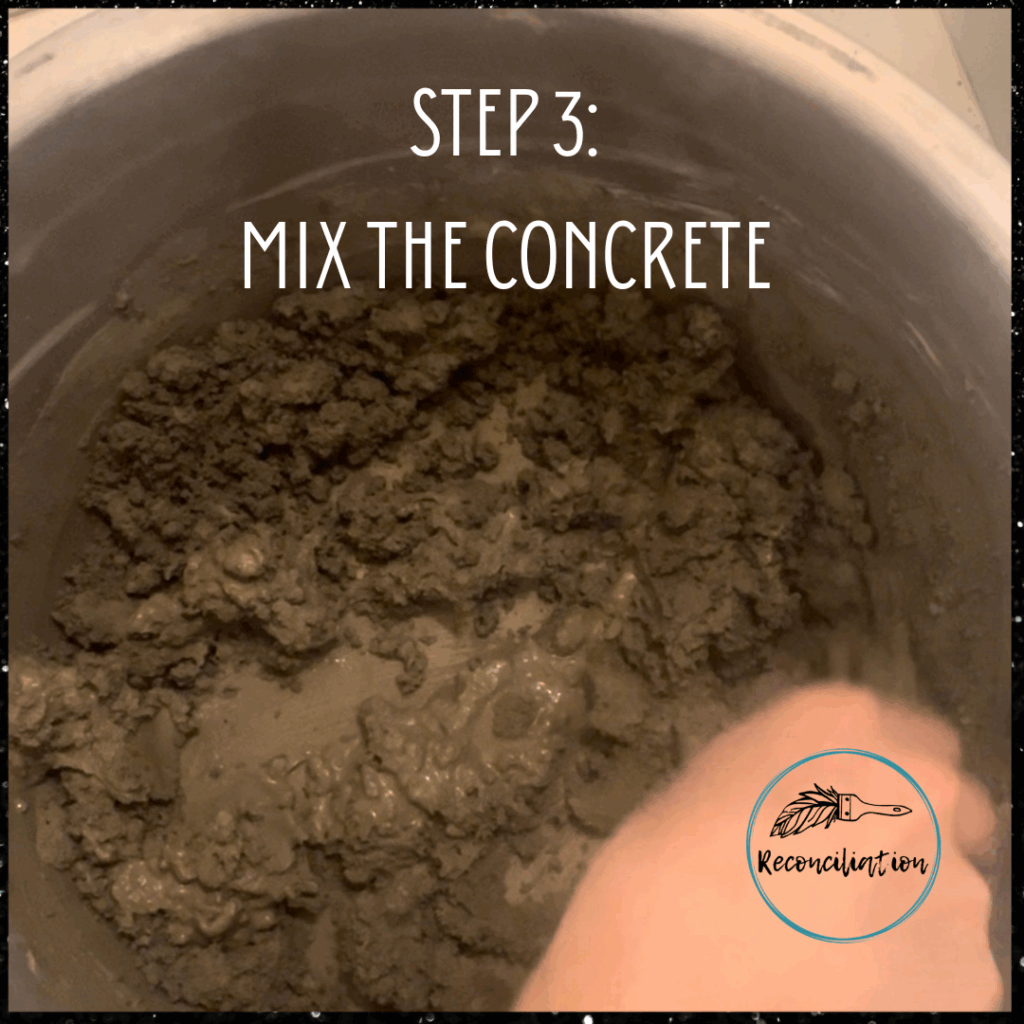
Step 3: Mix the concrete
You’ll need at least 2 boxes of Henry Feather Finish.
Side note: I couldn’t track down a second box locally and had to use an alternative product, so learn from my mistake and buy more than you need!
Mix small batches at a time following the package instructions. The consistency should be spreadable but not watery. Use a drill mixer attachment or a rubber spatula and mix in a disposable pan or bucket.
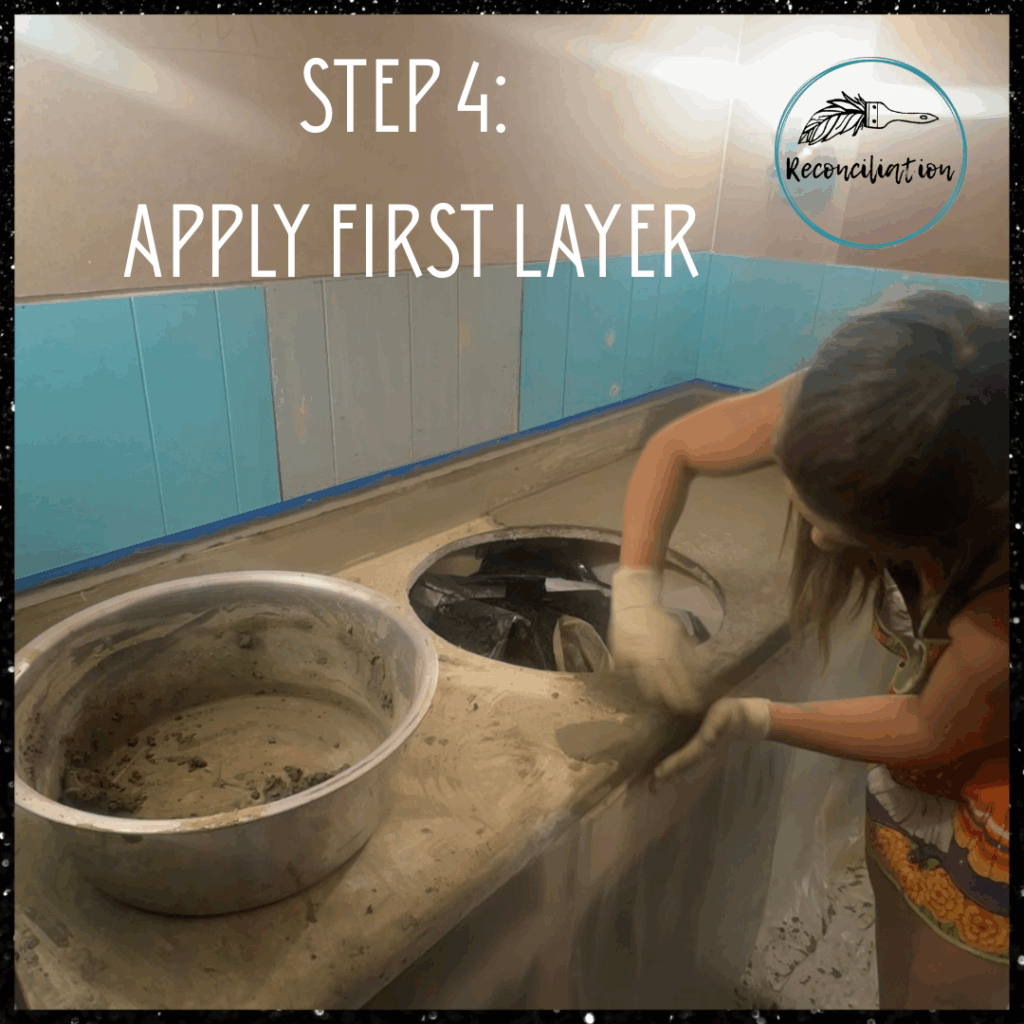
Step 4: Apply the first layer
Use gloved hands and a trowel or tile float to apply a thin, even layer over the countertop.
Don’t worry about perfection- this is your base coat – just ensure the entire surface is covered.
Let it dry for 12-24 hours before moving on.
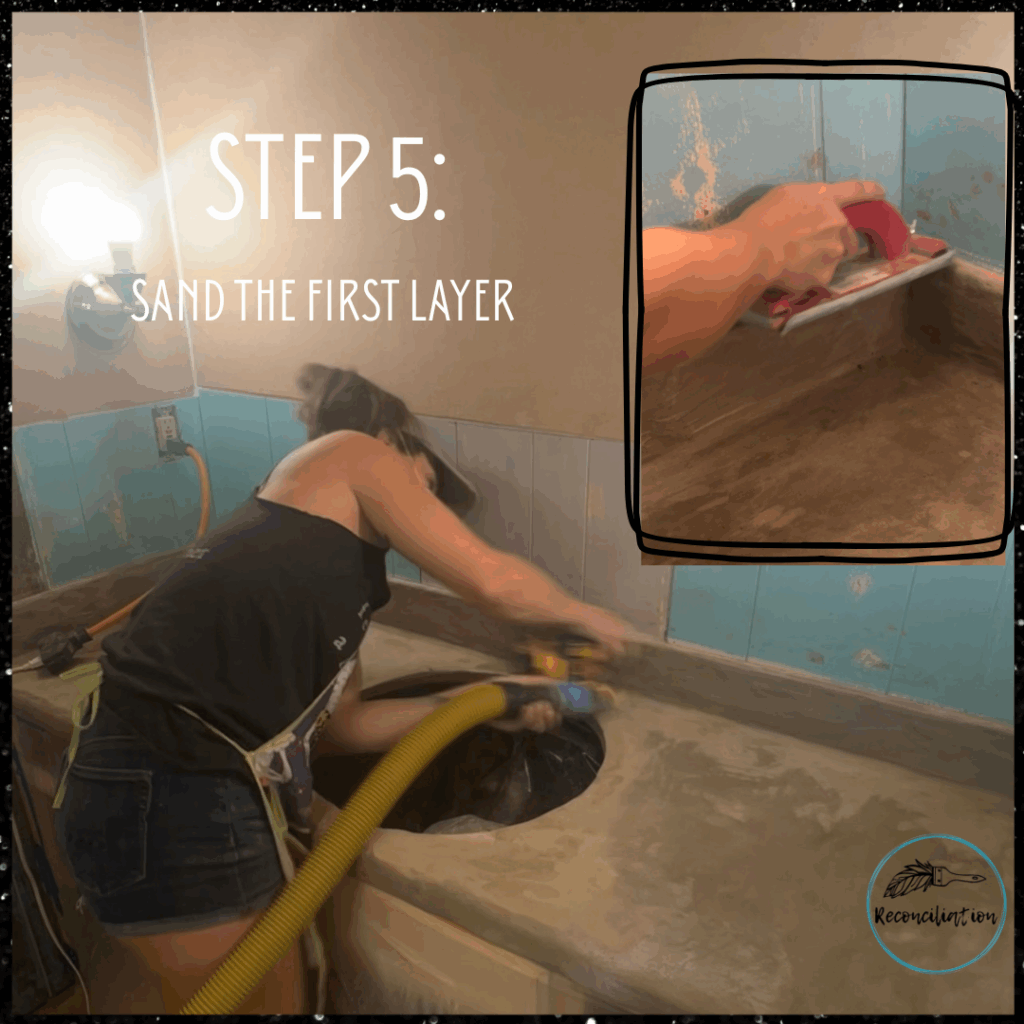
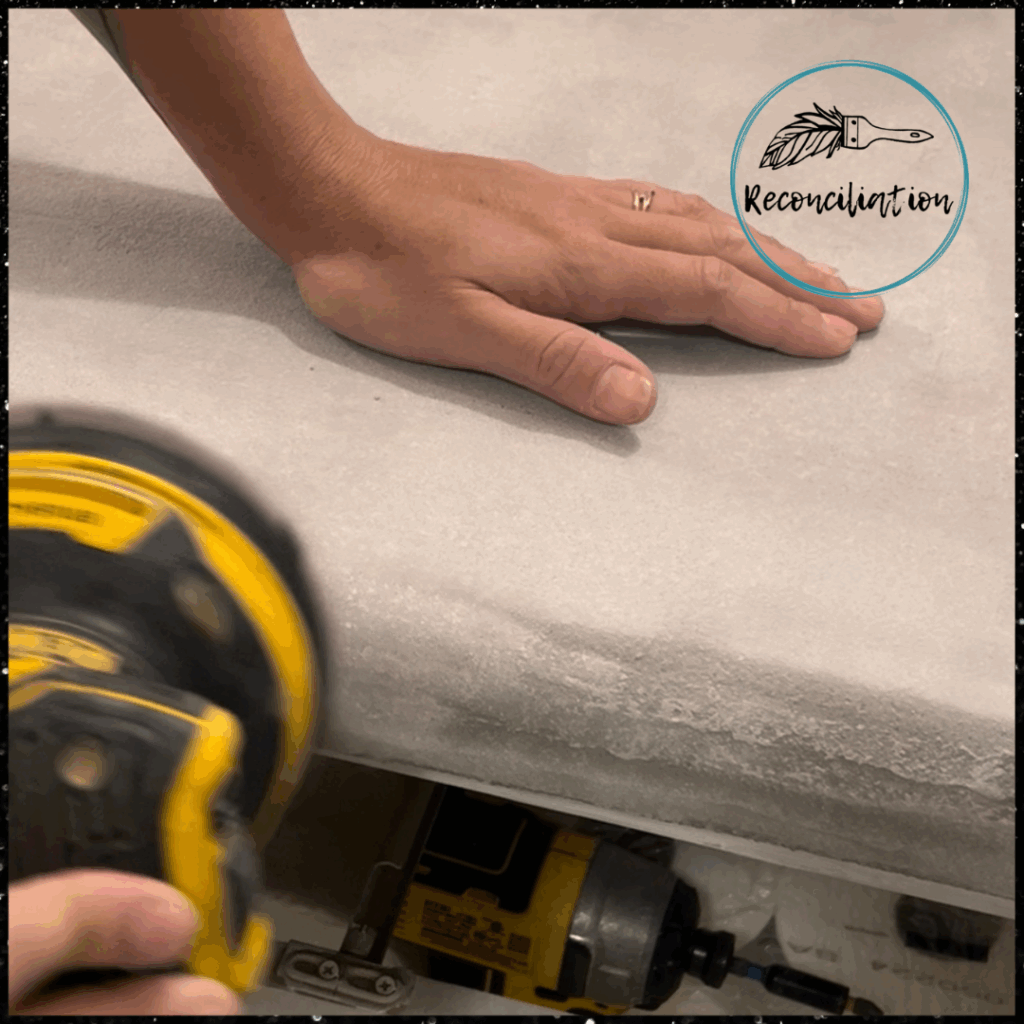
Step 5: Sand the first layer
Next, once dry, sand with 100-grit sandpaper to smooth out any roughness. Use a drywall sanding tool (pictured above) to get into corners & spaces the orbital sander cannot reach.
Followed by dust clean up with your ShopVac.
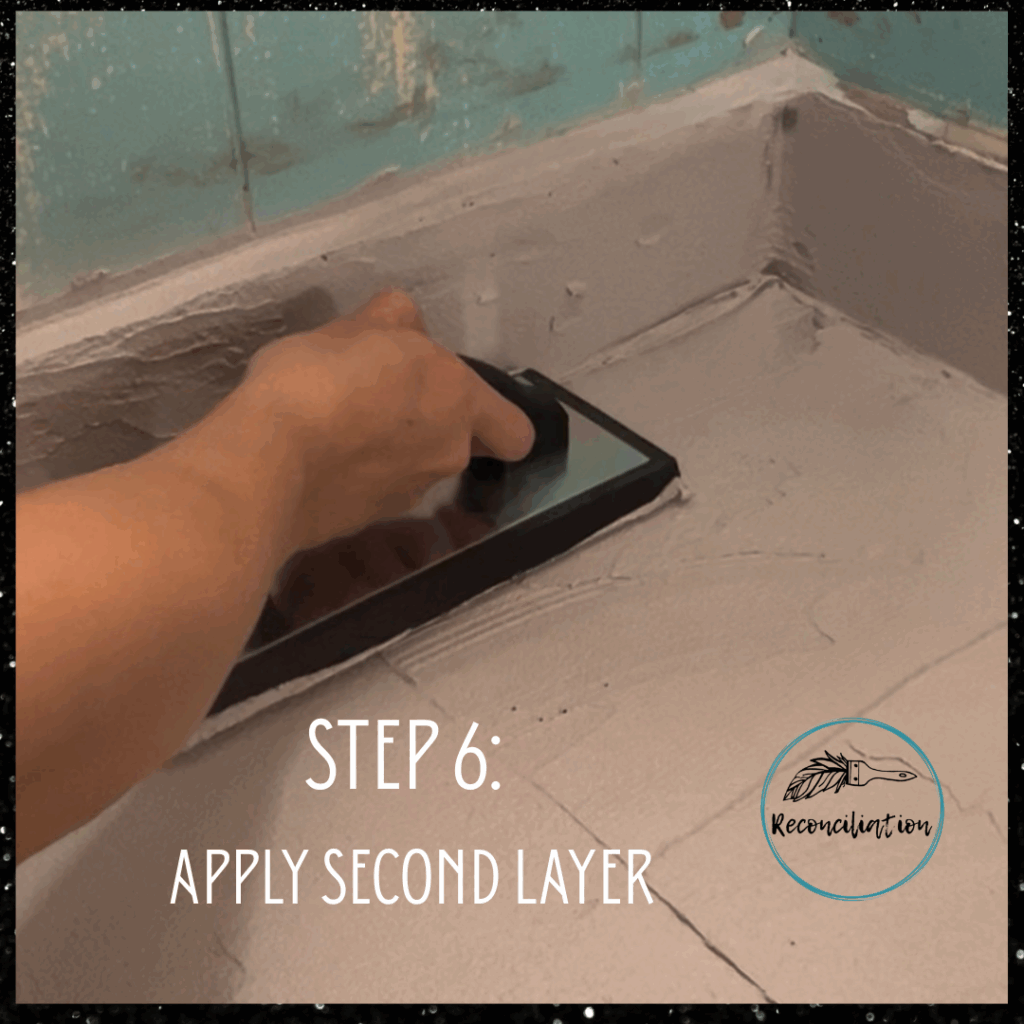
Step 6: Apply the second Layer
Mix a new batch (hopefully the same product!) and skim coat the surface again. Focus on leveling and even coverage. Use a metal trowel or tile float for the best results.
Side Note: As you can see, I ran out of Henry Feather finish and had to use an alternative product, which is why you can see a color & consistency change on my second application.
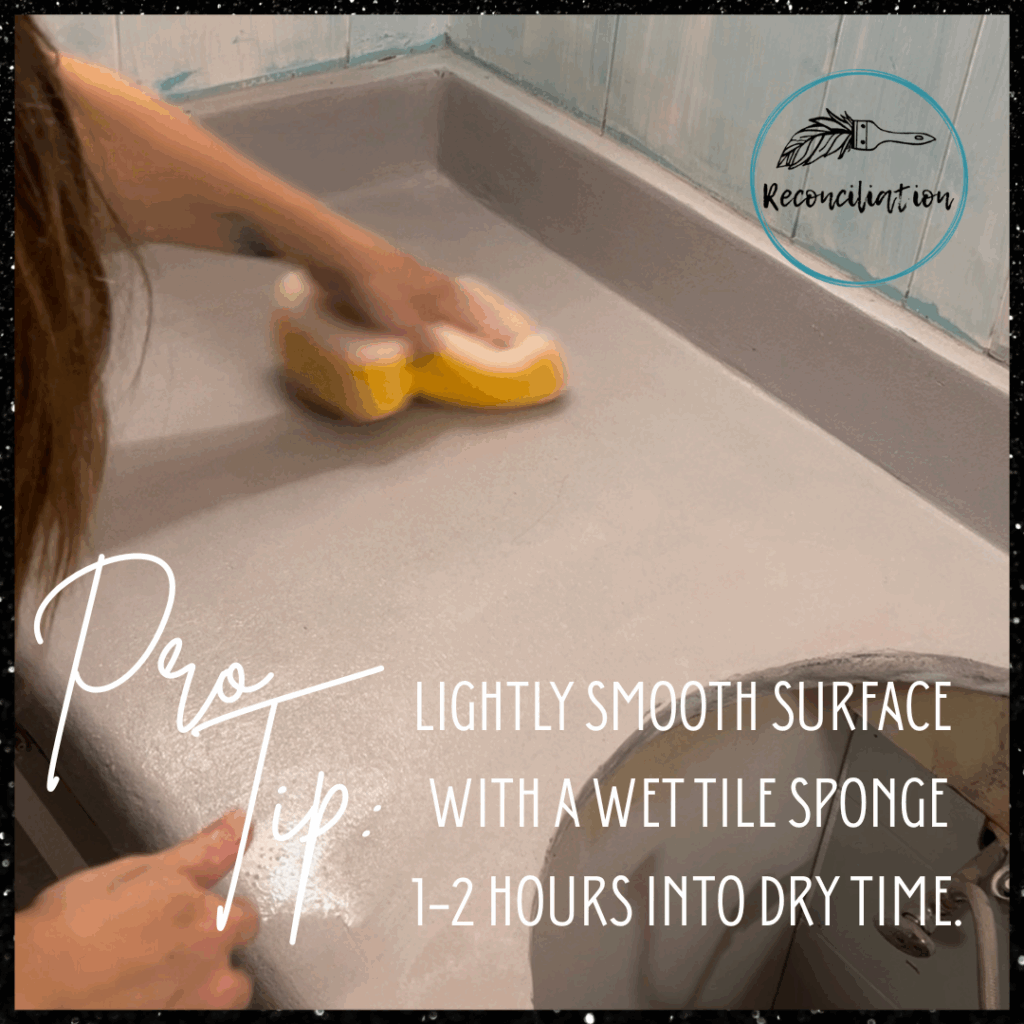
Pro Tip: About 1-2 hours into drying, lightly smooth the surface with a wet tile sponge to remove any harsh lines or splatters- this is called “wet” sanding.
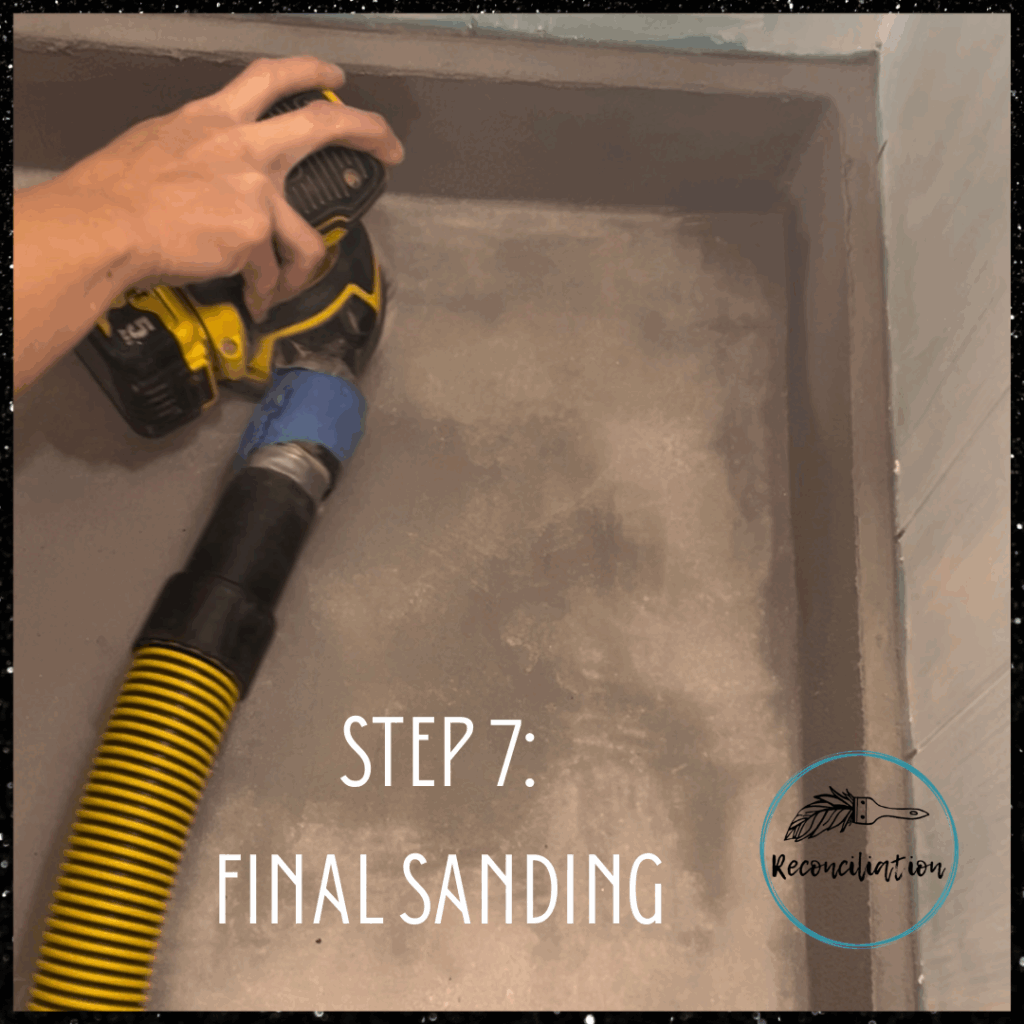
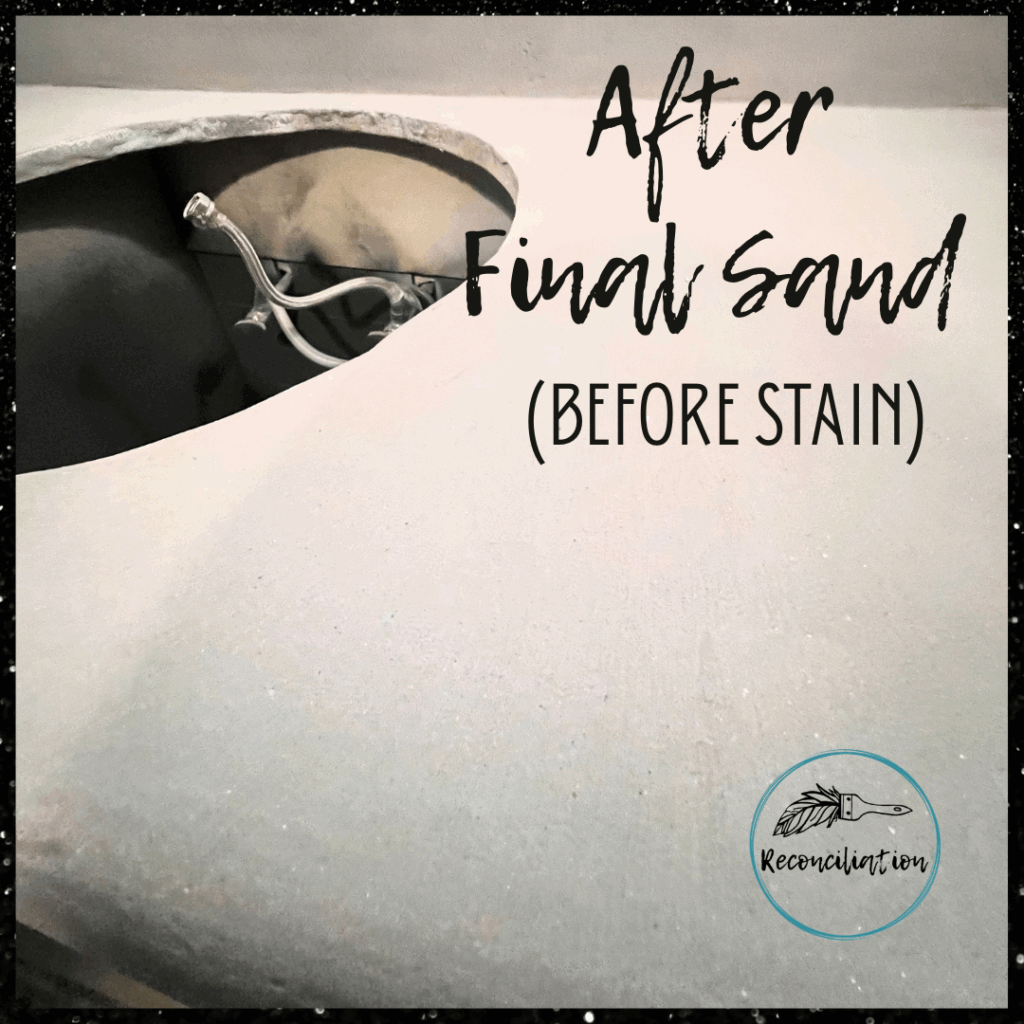
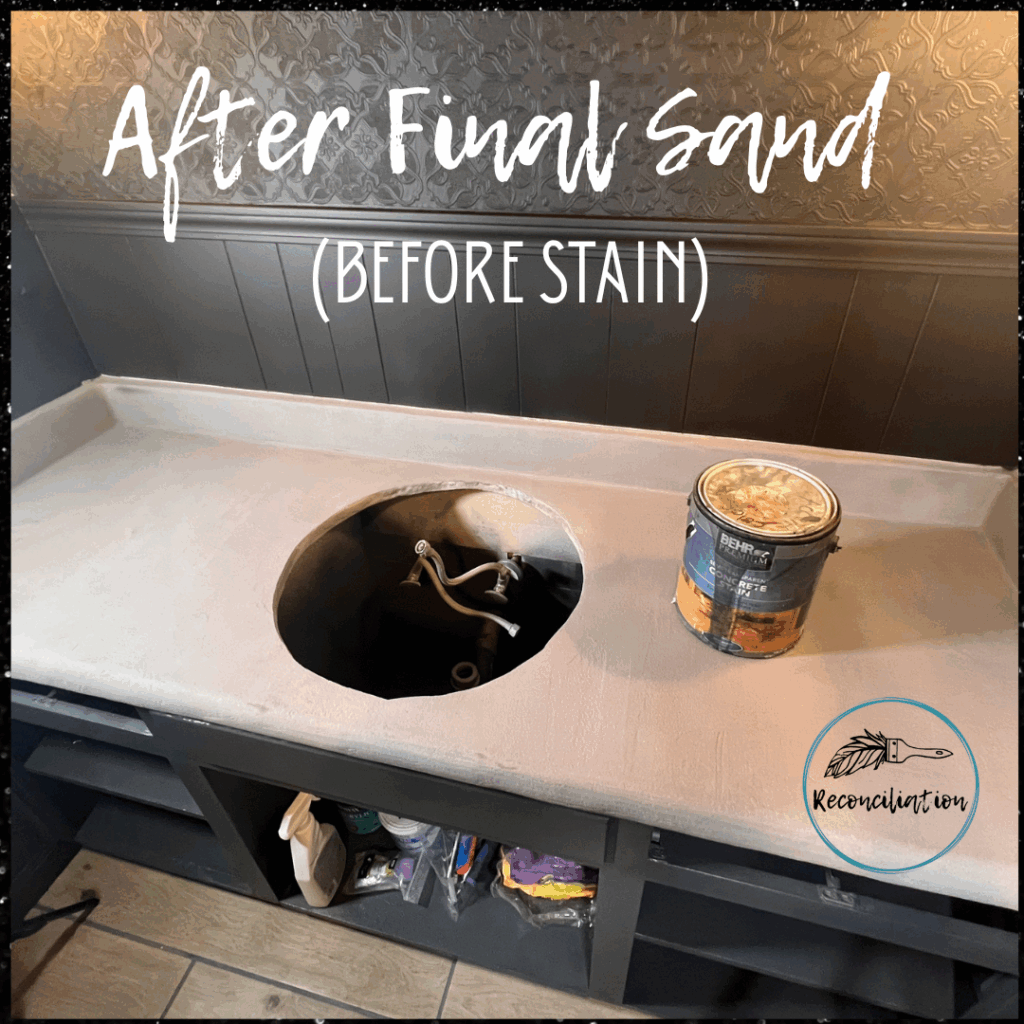
Step 7: FInal Sanding
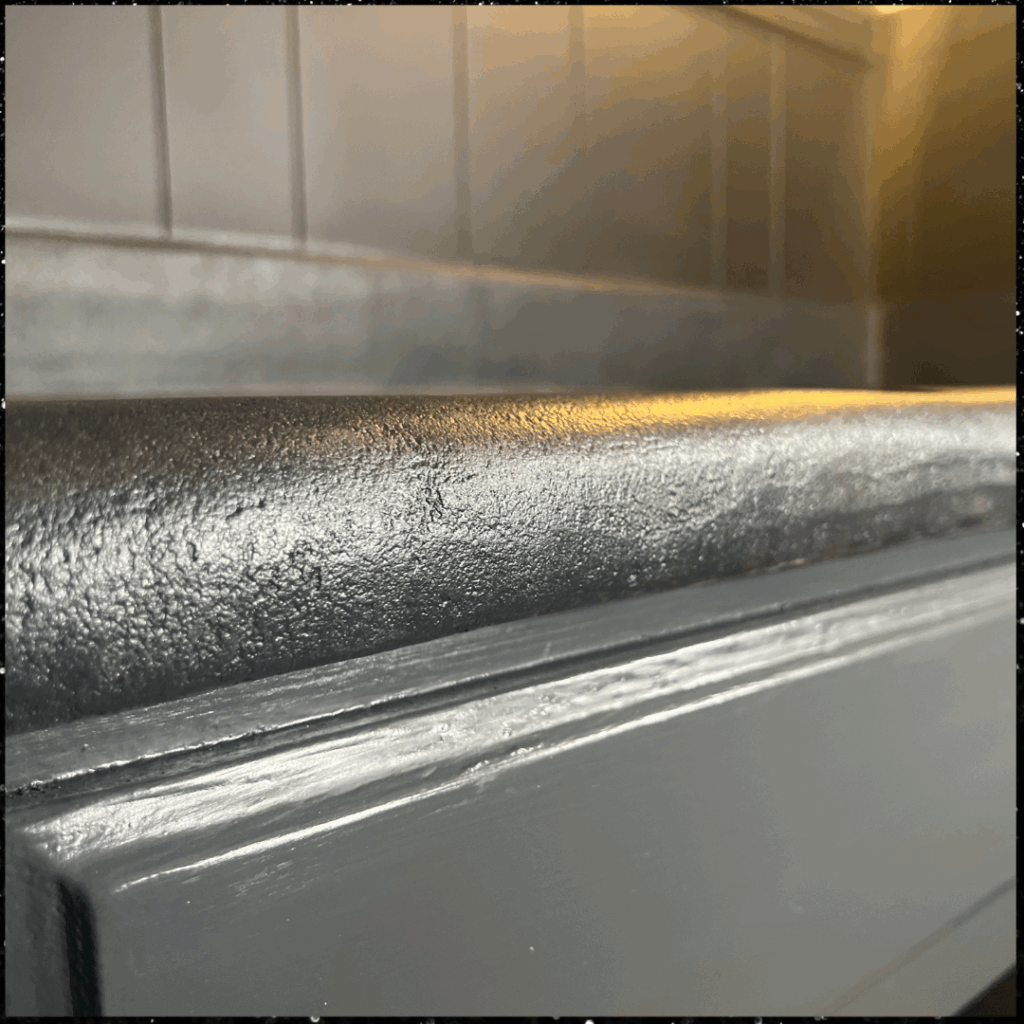
Use your orbital sander with 100-grit, then finish with 200-grit. or higher. The 100-grit is used for knock down & leveling- the 200-grit is used for polishing.
Your surface should now feel buttery smooth to the touch.
You can choose to be a perfectionist and skim coat again if you didn’t get your desired leveled, even surface in your second application, but don’t be too picky- once you stain, it tends to mask any imperfections and bring character to the finished product!
Step 8: Clean & dust Removal
Now it’s time to thoroughly clean: Use your shop vac on all surfaces, remove tape, plastic and dust from the room, and wipe the concrete gently with a wet tile sponge, pulling the dust toward you.
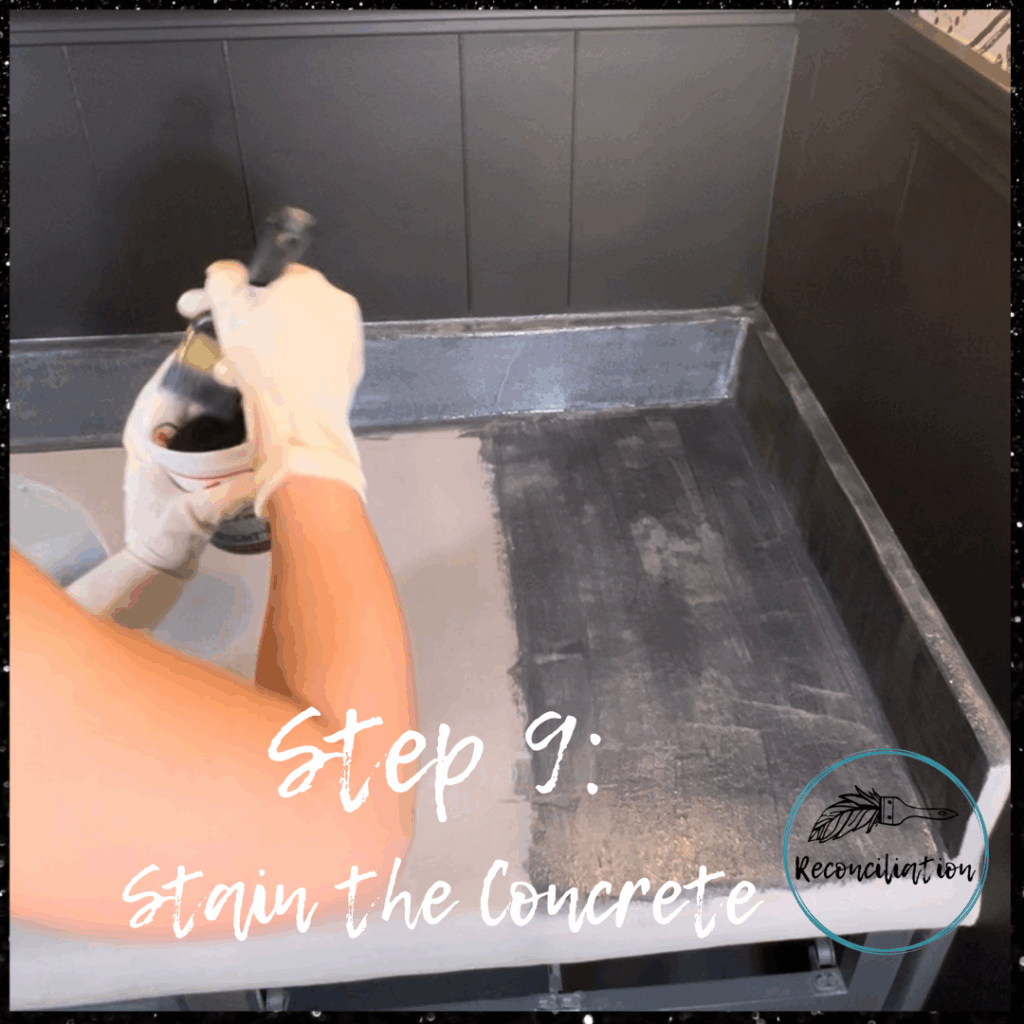
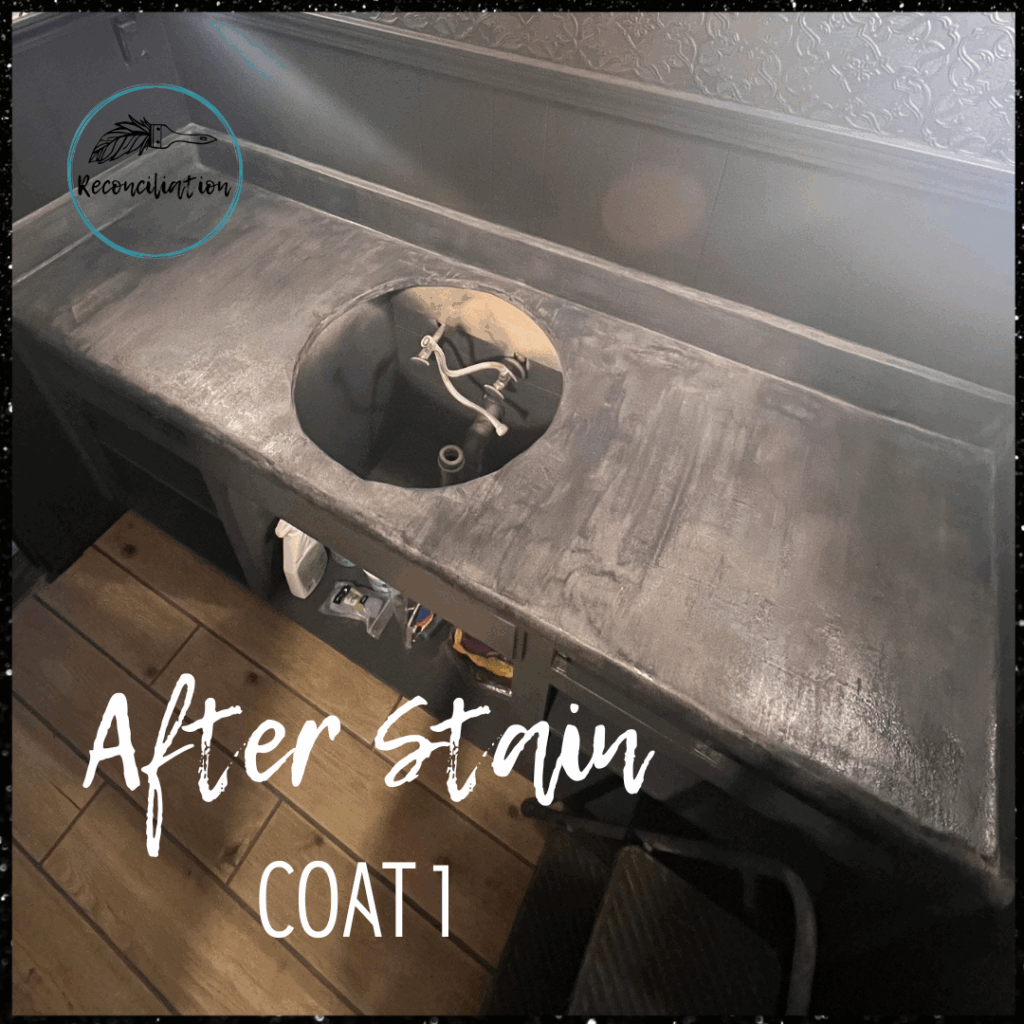
Step 9: Stain the concrete (optional)
If you want to add color, apply a concrete stain (found at Lower or Home Depot).
Let each coat dry completely before adding another. I used 2 coats to get my desired color tone.
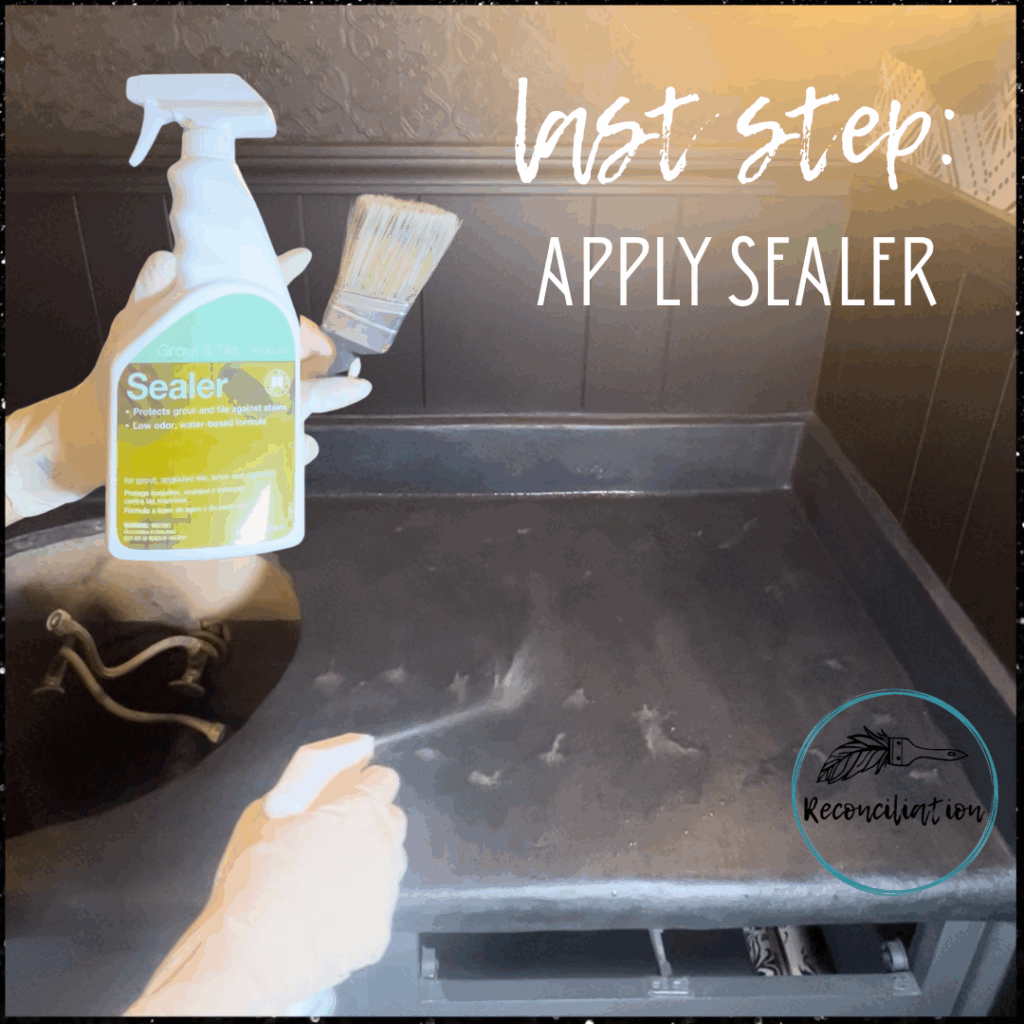
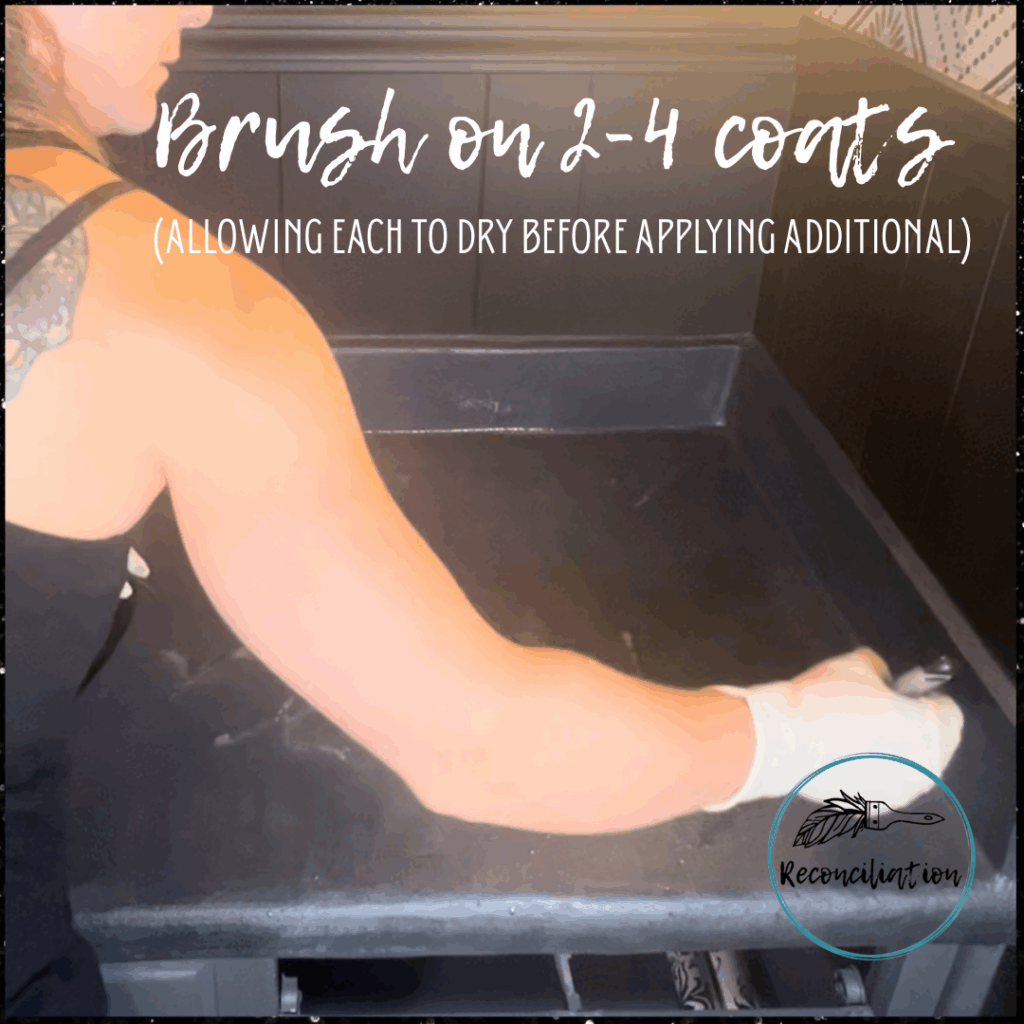
Step 10: Seal the countertops
Protect your hard work with a high-quality concrete sealer.
Apply 2-4 coats, allowing full drying time between layers.
Always read & follow the manufactures instructions for application method, dry times & number of applications needed.
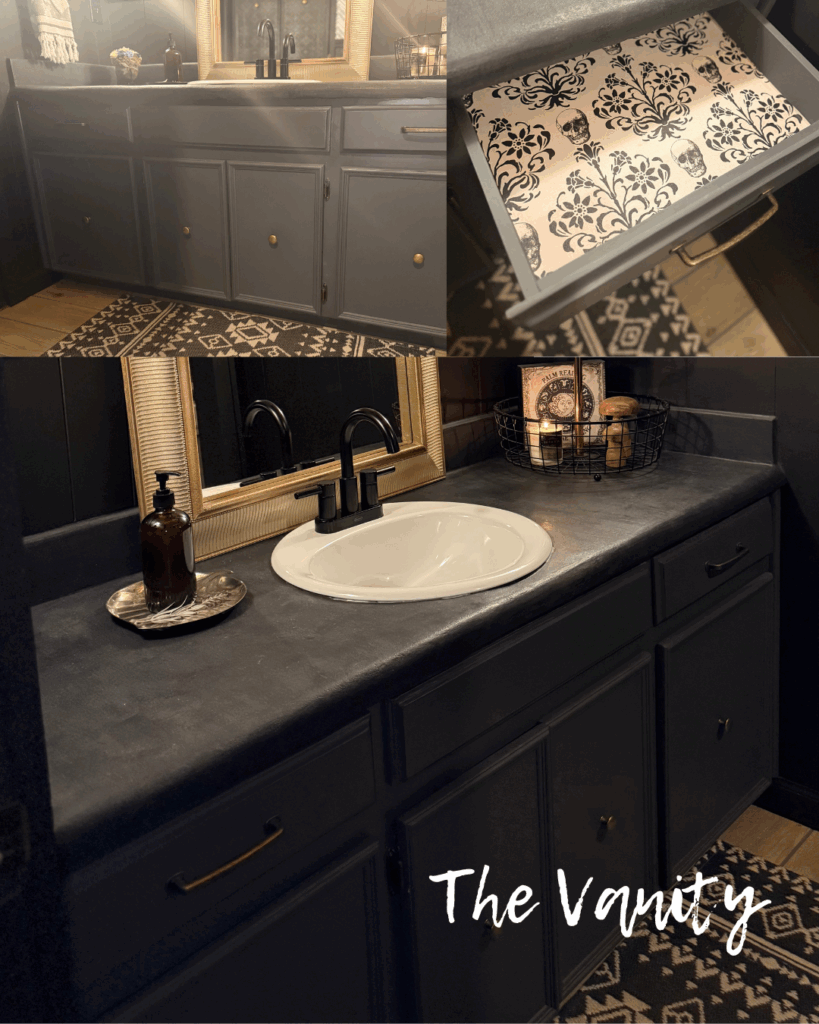
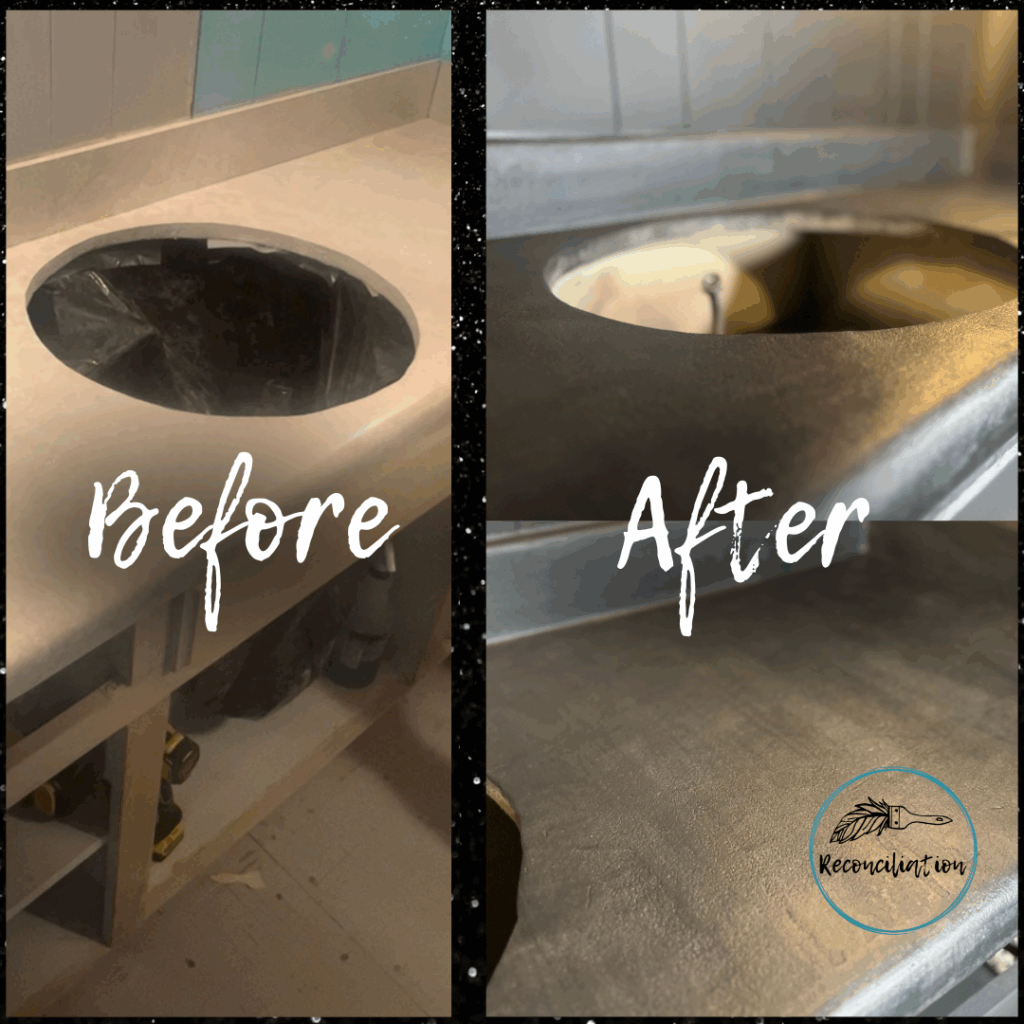
Before & after reveal
Can you believe these countertops were once basic laminate?! This affordable concrete overlay technique gave my bathroom a whole new look-without breaking the bank!
Final Thoughts
If you’ve been debating weather or not to try DIY concrete countertops, I hope this tutorial gives you the confidence to go for it! It’s a little messy, a little dusty, but the results are worth it!
BE SURE TO:
Follow me for more DIY’s, Check out the full material list in my Amazon storefront and PIN this post so you can reference it later!