Budget-friendly
guest bathroom remodel:part 2

Part 2: Budget-Friendly Guest Bathroom Remodel
Welcome to Part 2 of my Budget Friendly Guest Bathroom Remodel! If you missed Part 1, be sure to check it out for the first steps of this transformation. I’m breaking this full bathroom transformation into six parts that will align with video-the second part of the related video series is linked below.
In this second part, we’ll cover:
- Vanity paint removal
- Installing molding
- Priming all surfaces before paint
- Tools & products used in Part 2
 Quick Note: You may notice a few unconventional choices in the order of tasks I tackle. Since my husband works from home and has frequent meetings, I have to jump between quiet and noisy projects throughout the day!
https://youtube.com/shorts/IQK-TVV4ijo?feature=share
Guest Bathroom Remodel Video Series: Part 2

Step 1: cabinet prep- stripping & sanding
The first task in this part was prepping the cabinets. I started by using a chemical stripper to remove the old finish, followed by my trusty heat gun to tackle any stubborn paint remnants. I prefer to use the heat gun primarily on details. – This was my first time using my heat gun indoors & the fire alarm went off multiple times (once while my husband was in a meeting! ooopps, sorry boo!).
Once the cabinets were stripped down, it was time for sanding. I used my cordless Dewalt orbital sander with 100-grit sandpaper to thoroughly scuff the surfaces of both the cabinets & the countertop, ensuring they were ready for the DIY concrete counter tops & primer.
At this point, I then moved onto the concrete countertop, but because it’s a multiple step process- I will be covering this process in its own post & video entirely. So for now, we will be skipping to the next step in the renovation.
Shop stripping & sanding Tools available on amazon: Bathroom Remodel Part 2 Tools on Amazon
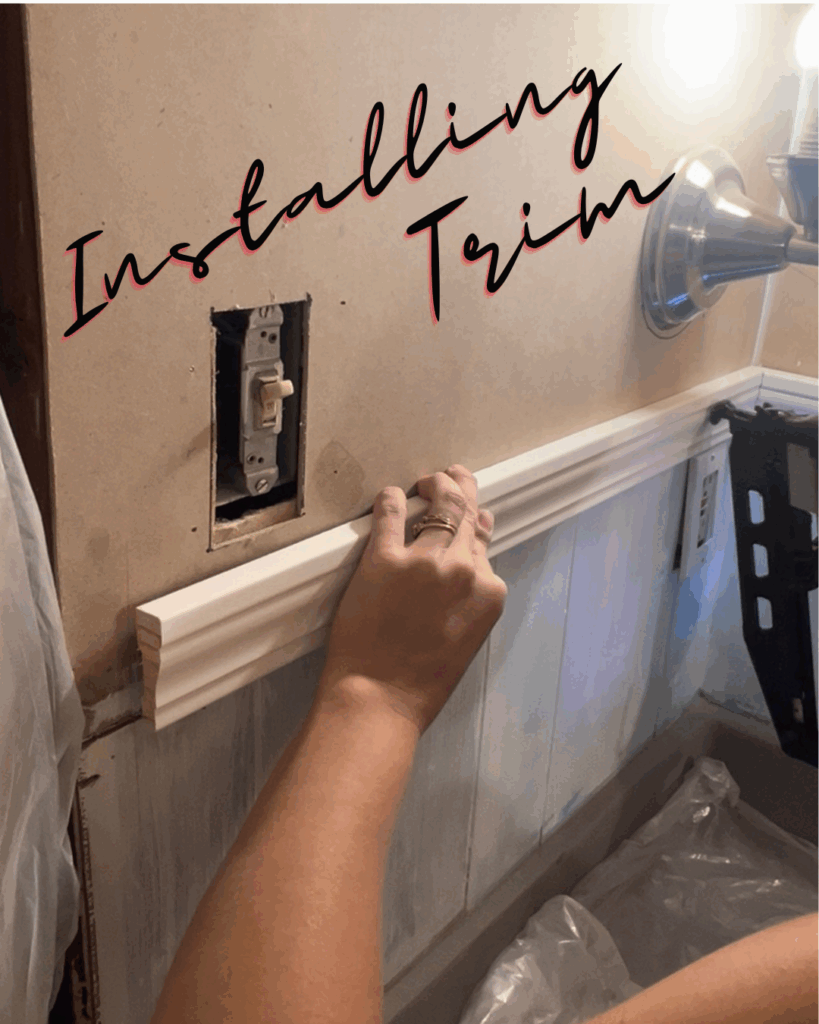
Step 2: Installing Molding & Caulking Seams
With the cabinets ready, it was time to shift focus to the walls. I wanted a clear separation between materials, so I installed molding to divide the upper & lower sections. The top half will be wallpapered and the lower half will be painted.
I used my Cordless Dewalt Finishing Nailer to attach the molding directly to the walls. Using a bead of caulk on the back of each section to keep it secure. Once the molding was set, I caulked all of the seams for a clean, finished look. The molding gives the space a more polished feel, and it helps define the different materials.
Link to view “part 2″ tools on amazon: bathroom remodel part 2 tools & products list

Step 3: Priming Everything Before Paint
After the molding was installed and caulked, it was time to paint all the surfaces. Using my cordless paint sprayer, I applied primer to everything below the molding, including inside the and out of the vanity cabinet.
Why prime? Priming helps with even paint coverage, stain blocking, paint adhesion and prevents issues like scratching and flaking over time. this is crucial for achieving a smooth, long last-lasting finish- especially in high traffic areas that will be cleaned with chemicals regularly.
What’s Next?
That is it for part 2 of my budget-friendly bathroom remodel. cabinet prep, molding and priming were crucial steps in laying the foundation for the final transformation. I’m so exited to continue sharing the journey with you!
See you next time!!

![]()
dont miss out on any of the fun!- follow me:
Facebook
Youtube
Link
Tiktok
Instagram
Pinterest